When it comes to enhancing the longevity and appearance of your outdoor living spaces, proper paver sealing and maintenance are essential. Pavers — whether they form your driveway, patio, pool deck, or walkway — are exposed to the elements, foot traffic, and seasonal changes. Without protection and upkeep, they can fade, crack, or develop stains, reducing both beauty and value. This ultimate guide walks you through best practices in sealing, cleaning, and caring for pavers so they stay durable and attractive for years to come.
In the early phase of any paver care routine, paver maintenance plays a pivotal role. This means more than just the occasional sweep; it involves periodic deep cleaning, sealing, and inspecting for damage. Regular maintenance helps prevent weeds or grass from pushing between pavers, inhibits mold or mildew growth, and reduces surface discolorations. By incorporating maintenance into your routine — ideally 2–3 times per year — you minimize long-term costs and avoid major repairs.
Why Sealing Matters
Pavers are made from concrete, stone, or clay — all of which are porous to varying degrees. That porosity allows water, dirt, oils, and debris to seep in. When left unsealed, these substances can cause discoloration, erosion, or structural weakening. Applying a quality sealant creates a protective barrier that:
- Repels water, preventing moisture penetration and freeze-thaw damage
- Resists oil and grease stains from vehicles or outdoor furniture
- Inhibits weed growth and sand erosion between joints
- Enhances color intensity, giving pavers a rejuvenated, clean look
With sealing, you essentially lock out the elements that degrade and dull paver surfaces — extending their life and reducing the frequency of costly restoration.
How to Prep and Seal Your Pavers
Proper preparation is key. Follow this step-by-step method to maximize the effectiveness of sealing:
- Deep Clean: Remove leaves, debris, and loose sand. Use a pressure washer or high-pressure hose to wash away dirt, mildew, old sealant residues, or stains. For oil stains, use a degreasing cleaner suited for pavers.
- Allow Complete Drying: After cleaning, let the pavers dry thoroughly — usually 24 to 48 hours. Sealing wet or damp pavers traps moisture inside, which can lead to bubbles or flaking later.
- Pour Joint Sand (if needed): Sweep kiln-dried joint sand between the paver joints. This stabilizes the paver grid and minimizes shifting. Lightly compact if possible.
- Choose the Right Sealant: For most outdoor projects, a penetrating or film-forming acrylic sealant works well. Penetrating sealants soak into the paver, offering subtle waterproofing without altering the surface sheen. Film-forming sealants create a slight top coat, often enhancing color and adding a glossy or satin finish.
- Apply Evenly: Use a low-pressure sprayer or roller to apply the sealant in thin, even coats. Avoid puddling. For best results, apply two thin coats rather than one thick one.
- Allow Cure Time: After application, allow the sealant to cure as recommended — often 24 to 48 hours before foot traffic, and up to a week before heavy loads or vehicles.
Recommended Care Schedule
| Frequency | Task |
|---|---|
| Twice a year | Sweep and rinse surface; check joints for sand loss |
| Every 1–2 years | Deep clean pavers and reapply joint sand if gaps appear |
| Every 2–3 years | Reapply sealant (especially for high-traffic areas) |
| After spills | Clean immediately to prevent staining (oils, food, drink, etc.) |
Consistent care ensures that pavers remain stable, safe, and visually appealing. Skipping maintenance could lead to shifting, weeds, and surface wear — problems that worsen over time and become more expensive to fix.
Common Mistakes to Avoid
- Sealing pavers before they’re fully dry: Traps moisture, leads to sealant failure
- Applying too much sealant at once: Causes uneven drying, stickiness, or peeling
- Ignoring joint sand: Without sand, pavers move under pressure causing cracks or unevenness
- Using harsh chemicals: Especially those containing acids — these can erode paver surfaces or damage sealants
- Heavy vehicle traffic too soon after sealing: Prevents proper curing, leading to premature wear
Avoiding those mistakes ensures your sealing efforts remain effective and long-lasting.
Seasonal Considerations
- Winter (Cold Climates): Use a penetrating sealant to reduce slipperiness and prevent moisture from freezing inside.
- Rainy Seasons: Ensure sealant has fully cured before rainfall; avoid sealing just before expected heavy rain.
- Hot, Sunny Climates: Choose a UV-resistant sealant to prevent color fading and breakdown from sun exposure. In extremely hot weather, apply sealant during cooler parts of the day to prevent rapid drying and uneven coating.
When to Consider Professional Help
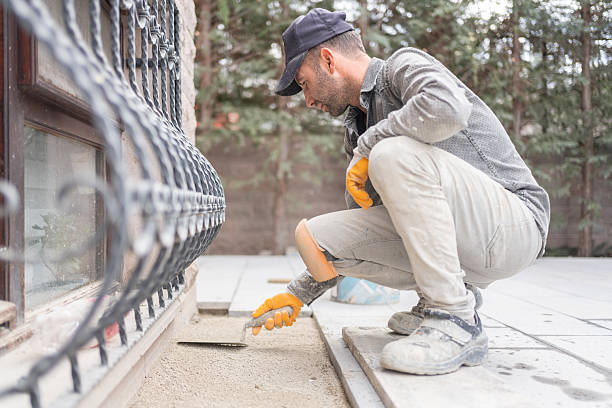
DIY sealing and maintenance works well for smaller patios or residential driveways. But for large installations (pool decks, commercial walkways, large driveways), or if pavers show structural issues (settling, cracks, unevenness), it’s often wiser to consult experienced professionals. They can provide expert cleaning, correct joint refilling, and high-quality sealing — ensuring structural integrity and aesthetic appeal for many years.
Conclusion
Proper paver sealing and maintenance extend the life, appearance, and safety of your outdoor paver surfaces. From regular cleaning to timely resealing and joint upkeep, a thoughtful care routine makes your patios, driveways, or walkways look new and last longer. For top-quality results and trusted service, rely on puppaversinc to handle sealing and long-term care with expertise and reliability.