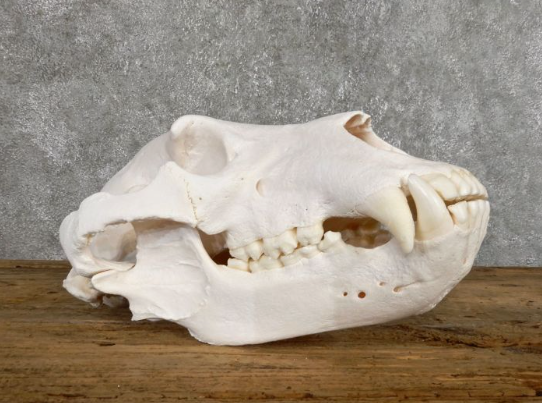
A bear skull mount makes a statement that few other trophies can match. The size, the teeth, the sheer presence of a cleaned bear skull on display tells visitors immediately that you have a story worth hearing. But getting from field to finished mount takes some work, and how you handle the preparation stages determines if you end up with a quality piece or a disappointing result.
Bear skulls present some specific challenges compared to deer or other game. The bone is denser, the grease content is higher, and the overall size means longer processing times at every stage. Knowing what to expect helps you avoid mistakes that could damage the skull or leave you with lingering problems down the road.
Field Handling Basics
Your preparation work starts the moment the bear is down. How you handle the skull in the field affects everything that comes after.
If you plan to keep the skull, remove the head from the carcass as soon as practical. Cut through the neck behind the skull, leaving yourself enough vertebrae attached to make handling easier. You can trim this down later during cleaning.
Keep the skull cool. Bears are often taken in warmer weather than deer season, and bacterial breakdown happens fast when temperatures climb. Get the head on ice or into a cooler as quickly as you can manage. If you are in the backcountry and cannot cool the skull immediately, at least keep it in shade and get it to refrigerate within a few hours.
Some hunters skin the head in the field, which makes sense if you are also keeping the hide for a rug or full mount. If the skull is your only concern, leaving the hide on during transport actually helps protect the bone from drying out.
Removing Tissue at Home
Once you have the skull at your workspace, the real preparation begins. Start by removing the hide if you have not already. Work carefully around the ears, eyes, and nose where skin adheres tightly.
Next comes the muscle tissue. A sharp knife handles the large chunks, but do not worry about getting every bit at this stage. You are just removing the bulk of the material to make later cleaning more effective.
The lower jaw can be detached by cutting through the connective tissue at the joint. Many people clean the skull and mandible separately, then reassemble them for display. This approach lets you reach areas that would otherwise be difficult to access.
Remove the brain through the opening at the base of the skull. This tissue is high in fat and breaks down quickly, so getting it out early prevents staining and odor issues. A bent wire or long screwdriver works for breaking up the brain tissue, followed by flushing with water until the cavity runs clear.
Dealing with Bear Grease
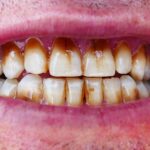
Here is where bear skulls get tricky. Bears carry a lot of fat, and that fat saturates the bone tissue. If you do not remove it properly, grease will continue seeping out of the skull for years, causing yellow staining and unpleasant smells.
Degreasing a bear skull takes patience. After initial cleaning through maceration or simmering, the skull needs to soak in a degreasing solution for weeks or sometimes months. Dawn dish soap in warm water works, as does clear ammonia for faster results.
Change the solution regularly and watch for grease floating on the surface. When the water stays clear between changes, you are getting close to done. Rushing this step is the most common mistake people make with bear skulls, and it shows in the finished product.
Maceration vs Simmering
Both methods work for bear skulls, but maceration generally produces better results. Submerging the skull in warm water and letting bacteria break down the tissue is gentler on the bone and avoids the risk of heat damage.
Simmering speeds up the process but requires careful temperature control. Never boil a bear skull. The high heat damages bone structure and can cook grease into the bone permanently. Keep the water at a low simmer and check frequently.
Whichever method you choose, expect bear skulls to take longer than deer skulls. The density of the bone and the volume of tissue mean more time at every stage.
Whitening & Finishing
After degreasing, whitening brings the skull to display condition. Hydrogen peroxide is the standard choice because it whitens without damaging bone the way bleach does. Concentrations between 3 and 12 percent work well depending on how fast you want results.
Apply the peroxide by brushing or submerging, then cover with plastic wrap to slow evaporation. Check after 24 hours and continue until you reach your desired whiteness. Rinse thoroughly when finished.
When to Call a Professional
Bear skull preparation is time-consuming, and the margin for error is smaller than with other species. If you do not have the space for weeks of soaking, the ability to control temperatures during simmering, or simply the patience for the degreasing stage, a professional might be the better choice.
Tori’s Taxidermy handles bear skull preparation regularly and has the setup to do it right. Their process accounts for the extra degreasing time that bear skulls need, and the results reflect that attention. For hunters who want a quality mount without dedicating a garage corner to buckets of water for two months, professional preparation makes sense.
However you approach it, a properly prepared bear skull becomes a lasting display piece. Take your time, do not skip the degreasing, and you will have something worth showing off.